Mysql8
环境准备
ansible
ansible安装
启用 EPEL 存储库
Ansible 在默认的 CentOS 8 存储库中可能没有,因此需要启用 EPEL(Extra Packages for Enterprise Linux)存储库,它包含了许多额外的软件包。使用以下命令启用 EPEL 存储库:
sudo mkdir /etc/yum.repos.d/bak
sudo mv /etc/yum.repos.d/*.repo /etc/yum.repos.d/bak/
#由于epel源迁移,改国内源
sudo wget -O /etc/yum.repos.d/CentOS-BaseOS.repo https://mirrors.aliyun.com/repo/Centos-8.repo
sudo wget -O /etc/yum.repos.d/epel-archive-8.repo https://mirrors.aliyun.com/repo/epel-archive-8.repo
sudo wget -O /etc/yum.repos.d/epel.repo https://mirrors.aliyun.com/repo/epel.repo
sudo wget -O /etc/yum.repos.d/epel-testing.repo https://mirrors.aliyun.com/repo/epel-testing.repo
[参考如下]
更新系统软件包
启用 EPEL 存储库后,建议更新系统的所有软件包到最新版本,以确保系统的稳定性和安全性。执行以下命令进行更新:
sudo dnf update -y安装 Ansible
使用 dnf 包管理器安装 Ansible:
sudo pip3 install --upgrade pip

pip3 install -i https://mirrors.aliyun.com/pypi/simple/ ansible

###
#或编辑 pip 配置文件。如果该文件不存在,需要手动创建:
mkdir -p ~/.pip
nano ~/.pip/pip.conf

[global]
index-url = https://mirrors.aliyun.com/pypi/simple/

[install]
trusted-host = mirrors.aliyun.com
验证安装
安装完成后,可以通过查看 Ansible 的版本号来验证是否安装成功:
ansible --version配置 Ansible(可选)
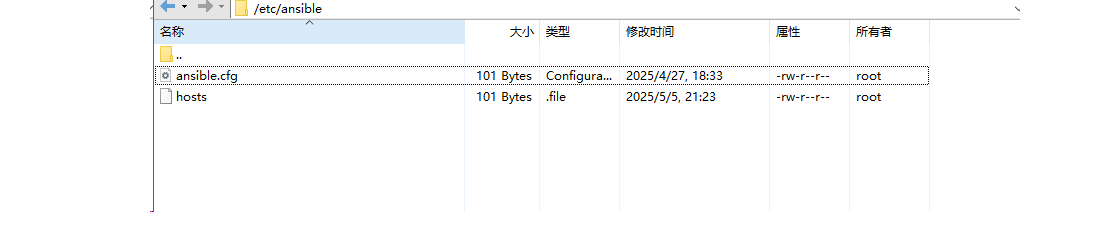
Ansible 的主配置文件位于/etc/ansible/ansible.cfg,主机清单文件位于 /etc/ansible/hosts。你可以根据需要编辑这些文件来配置 Ansible。例如,编辑主机清单文件添加要管理的主机:
sudo nano /etc/ansible/hosts在文件中添加如下格式的主机信息:
[dbsrv]
192.168.1.101
192.168.1.102
192.168.1.103
配置SSH 无密码访问
生成 SSH 密钥对 在 Ansible 控制节点上生成 SSH 密钥对。如果已经有密钥对,可以跳过此步骤。打开终端,执行以下命令:
ssh-keygen -t rsa创建 Ansible 清单文件
创建一个名为 hosts 的清单文件,把要配置 SSH 免密访问的 CentOS 8 主机信息添加进去,示例如下
[all]
192.168.1.51 ansible_user=root ansible_password=123
192.168.1.52 ansible_user=root ansible_password=123
192.168.1.53 ansible_user=root ansible_password=123
192.168.1.61 ansible_user=root ansible_password=123
192.168.1.62 ansible_user=root ansible_password=123
192.168.1.63 ansible_user=root ansible_password=123

[dbsrv]
192.168.1.51
192.168.1.52
192.168.1.53

[rdsrv]
192.168.1.61
192.168.1.62
192.168.1.63
这里的 all 是主机组名,ansible_user 是远程主机的用户名,ansible_password 是对应的密码
创建 Ansible Playbook
创建一个名为 ssh_key_deploy.yml 的 YAML 文件,内容如下:
---
- name: Deploy SSH public key to CentOS 8 hosts
  hosts: all
  gather_facts: no
  become: yes

  tasks:
    - name: Install sshpass
      yum:
        name: sshpass
        state: present

    - name: Create .ssh directory if not exists
      file:
        path: ~/.ssh
        state: directory
        mode: '0700'

    - name: Copy SSH public key to target hosts
      authorized_key:
        user: "{{ ansible_user }}"
        state: present
        key: "{{ lookup('file', '~/.ssh/id_rsa.pub') }}"
解释 Playbook
hosts:指定要执行任务的主机组,这里是all。gather_facts:设为no表示不收集目标主机的事实信息,可加快执行速度。become:设为yes表示需要使用sudo权限。tasks:包含多个任务。
安装
sshpass:使用yum包管理器安装sshpass,它用于在复制公钥时输入密码。创建
.ssh目录:使用file模块确保目标主机上的.ssh目录存在,并且权限设置为0700。复制 SSH 公钥:使用
authorized_key模块将本地的公钥复制到目标主机的~/.ssh/authorized_keys文件中。
安装 sshpass
https://www.rpmfind.net/linux/rpm2html/search.php?query=sshpass(x86-64)
运行 Playbook
在终端中执行以下命令来运行 Playbook:
ansible-playbook ssh_key_deploy.yml --ssh-common-args='-o StrictHostKeyChecking=no'-i hosts.ini:指定使用的清单文件。ssh_key_deploy.yml:要执行的 Playbook 文件。
验证 SSH 免密访问
运行完 Playbook 后,尝试使用 SSH 连接到目标主机,检查是否能免密登录:
ssh root@192.168.1.101若无需输入密码即可登录,说明 SSH 免密访问配置成功。
Ansible构建Mysql8集群
根据以下步骤构建yaml文件
CentOS 8 环境配置详细步骤和说明
1. 准备工作
确保有至少 3 台 CentOS 8 服务器,分别作为主节点和两个从节点。
确保所有服务器都可以通过 SSH 相互访问,并且可以使用 Ansible 进行管理。
在控制节点上安装 Ansible。
2. 配置阿里云源
在所有节点上,替换默认的 CentOS 源为阿里云源。
# 备份原有的 repo 文件
sudo mv /etc/yum.repos.d/CentOS-Base.repo /etc/yum.repos.d/CentOS-Base.repo.backup
# 下载阿里云的 CentOS 8 repo 文件
sudo curl -o /etc/yum.repos.d/CentOS-Base.repo https://mirrors.aliyun.com/repo/Centos-8.repo
# 清除缓存并生成新的缓存
sudo dnf clean all
sudo dnf makecache
3. 关闭防火墙和 SELinux
在所有节点上关闭防火墙和 SELinux,以避免网络和权限问题。
# 关闭防火墙
sudo systemctl stop firewalld
sudo systemctl disable firewalld
# 临时关闭 SELinux
sudo setenforce 0
# 永久关闭 SELinux
sudo sed -i 's/SELINUX=enforcing/SELINUX=disabled/g' /etc/selinux/config
4. 安装 MySQL 8.4
在所有节点上安装 MySQL 8.4
# 安装 MySQL 8.4 源
sudo dnf install -y https://repo.mysql.com//mysql80-community-release-el8-1.noarch.rpm
# 安装 MySQL 服务器
sudo dnf install -y mysql-community-server
# 启动 MySQL 服务并设置开机自启
sudo systemctl start mysqld
sudo systemctl enable mysqld
5. 初始化 MySQL
在所有节点上初始化 MySQL 并设置 root 密码。
# 获取初始临时密码
sudo grep 'temporary password' /var/log/mysqld.log
# 使用初始临时密码登录 MySQL
mysql -u root -p
# 修改 root 密码
ALTER USER 'root'@'localhost' IDENTIFIED BY 'YourPassword';
6. 配置主节点
修改 MySQL 配置文件 /etc/my.cnf:
[mysqld]
server-id = 1
log-bin = mysql-bin
binlog-do-db = work
character-set-server = utf8
collation-server = utf8_general_ci
重启 MySQL 服务:
sudo systemctl restart mysqld创建 work 库:
CREATE DATABASE work CHARACTER SET utf8 COLLATE utf8_general_ci;创建用于复制的用户并授予权限:
CREATE USER 'repl'@'%' IDENTIFIED BY 'ReplicationPassword';
GRANT REPLICATION SLAVE ON *.* TO 'repl'@'%';
FLUSH PRIVILEGES;
查看主节点的二进制日志信息:
SHOW MASTER STATUS;记录下 File 和Position 的值,后续从节点配置时会用到。
7. 配置从节点
修改 MySQL 配置文件 /etc/my.cnf:
[mysqld]
server-id = 2  # 从节点 1
# server-id = 3  # 从节点 2
relay-log = mysql-relay-bin
log-bin = mysql-bin
binlog-do-db = work
character-set-server = utf8
collation-server = utf8_general_ci
重启 MySQL 服务:
sudo systemctl restart mysqld连接到从节点的 MySQL 并配置复制:
CHANGE MASTER TO
    MASTER_HOST='主节点 IP',
    MASTER_USER='repl',
    MASTER_PASSWORD='ReplicationPassword',
    MASTER_LOG_FILE='主节点的 File 值',
    MASTER_LOG_POS=主节点的 Position 值;
START SLAVE;
检查从节点的复制状态:
SHOW SLAVE STATUS\G确保Slave_IO_Running 和 Slave_SQL_Running 都为 Yes。
Ansible Playbook 的 YAML 文件详细配置步骤和说明
---
- name: Install and configure MySQL 8.0 cluster
  hosts: mysql_cluster
  gather_facts: no
  vars:
    mysql_root_password: "MySql@12345677#!"
    replication_user: repl
    replication_password: "MySql@123456789#!"
  tasks:
    - name: Debug inventory_hostname
      debug:
        var: inventory_hostname

    - name: Disable firewalld
      systemd:
        name: firewalld
        state: stopped
        enabled: false

    - name: Disable SELinux
      selinux:
        state: disabled

    - name: Install Python3 and pip
      dnf:
        name:
          - python3
          - python3-pip
        state: present

    - name: Install Rust development environment
      block:
        - name: Download Rust installation script with retry
          shell: |
            MAX_RETRIES=3
            DELAY=10
            for i in $(seq 1 $MAX_RETRIES); do
               curl --proto '=https' --tlsv1.2 -sSf -o /tmp/rustup.sh https://sh.rustup.rs
             if [ $? -eq 0 ]; then
               break
             fi
             if [ $i -lt $MAX_RETRIES ]; then
               sleep $DELAY
             fi
            done
          args:
            creates: /tmp/rustup.sh

        - name: Upgrade pip to the latest version
          pip:
            name: pip
            state: latest
            extra_args: '-i https://mirrors.aliyun.com/pypi/simple/'

        - name: Set execute permission for Rust installation script
          file:
            path: /tmp/rustup.sh
            mode: '0755'

        - name: Run Rust installation script with Alibaba Cloud mirror
          shell: |
            export RUSTUP_DIST_SERVER=https://mirrors.aliyun.com/rustup
            export RUSTUP_UPDATE_ROOT=https://mirrors.aliyun.com/rustup/rustup
            /tmp/rustup.sh -y
          args:
            creates: $HOME/.cargo

        - name: Source Rust environment
          shell: source $HOME/.cargo/env
          args:
            executable: /bin/bash

    - name: Install setuptools_rust
      pip:
        name: setuptools_rust
        state: present
        extra_args: '-i https://mirrors.aliyun.com/pypi/simple/'

    - name: Install cryptography package
      pip:
        name: cryptography
        state: present
        extra_args: '-i https://mirrors.aliyun.com/pypi/simple/'

    - name: Import MySQL GPG key
      rpm_key:
        state: present
        key: https://repo.mysql.com/RPM-GPG-KEY-mysql-2022


    - name: Install MySQL 8.0 repository
      dnf:
        name: https://repo.mysql.com//mysql80-community-release-el8-1.noarch.rpm
        state: present
        disable_gpg_check: yes

    - name: Clean DNF cache
      shell: dnf clean all
      args:
        warn: false

    - name: Disable MySQL module using shell
      shell: dnf module disable mysql -y
      args:
        warn: false

    - name: Install MySQL server
      dnf:
        name: mysql-community-server
        state: present
        disable_gpg_check: yes

    - name: Start and enable MySQL service
      systemd:
        name: mysqld
        state: started
        enabled: true

    - name: Set authentication plugin to mysql_native_password
      lineinfile:
        path: /etc/my.cnf
        line: "default_authentication_plugin = mysql_native_password"
        create: true
      notify:
        - Restart MySQL

    - name: Get initial root password
      shell: grep 'temporary password' /var/log/mysqld.log | awk '{print $NF}'
      register: initial_root_password
      changed_when: false

    - name: Set root password using socket
      shell: |
        mysql -u root -p"{{ initial_root_password.stdout }}"  --connect-expired-password -e  "ALTER USER 'root'@'localhost' IDENTIFIED BY '{{ mysql_root_password }}';"
      ignore_errors: true

    - name: Flush privileges
      mysql_query:
        query: FLUSH PRIVILEGES
        login_user: root
        login_password: "{{ mysql_root_password }}"
      ignore_errors: true

    - name: Check root password validity
      mysql_query:
        query: SELECT 1
        login_user: root
        login_password: "{{ mysql_root_password }}"
      register: root_password_check
      ignore_errors: true

    - name: Reset root password if invalid
      mysql_user:
        name: root
        password: "{{ mysql_root_password }}"
        host: localhost
        priv: '*.*:ALL,GRANT'
        login_unix_socket: /var/lib/mysql/mysql.sock
      when: root_password_check.failed

    - name: Check if root password has expired
      mysql_query:
        query: SELECT user, host, password_expired FROM mysql.user WHERE user = 'root' AND host = 'localhost'
        login_user: root
        login_password: "{{ mysql_root_password }}"
      register: password_expiry_check
      ignore_errors: true

    - name: Debug inventory_hostname
      debug:
        var: inventory_hostname

    - name: Check MySQL service status
      systemd:
        name: mysqld
        state: started
      register: mysql_service_status
      ignore_errors: true

    - name: Restart MySQL service if not running
      systemd:
        name: mysqld
        state: restarted
      when: mysql_service_status.failed


    - name: Check root password validity again
      mysql_query:
        query: SELECT 1
        login_user: root
        login_password: "{{ mysql_root_password }}"
      register: root_password_check_again
      ignore_errors: true

    - name: Reset root password one more time if still invalid
      mysql_user:
        name: root
        password: "{{ mysql_root_password }}"
        host: localhost
        priv: '*.*:ALL,GRANT'
        login_unix_socket: /var/lib/mysql/mysql.sock
      when: root_password_check_again.failed

    - name: Create replication user
      shell: |
        mysql -u root -p"{{ mysql_root_password }}" -e "
        CREATE USER '{{ replication_user }}'@'%' IDENTIFIED WITH mysql_native_password  BY '{{ replication_password }}';
        GRANT REPLICATION SLAVE ON *.* TO '{{ replication_user }}'@'%';
        FLUSH PRIVILEGES;"
      delegate_to: 192.168.1.51
      ignore_errors: true

    - name: Create work database
      mysql_db:
        name: work
        encoding: utf8mb4
        collation: utf8mb4_general_ci
        state: present
        login_user: root
        login_password: "{{ mysql_root_password }}"
      delegate_to: 192.168.1.51
      ignore_errors: true

    - name: Configure master node
      blockinfile:
        path: /etc/my.cnf
        block: |
          server-id = 1
          relay-log = mysql-relay-bin
          log-bin = mysql-bin
          binlog-do-db = work
          character-set-server = utf8mb4
          collation-server = utf8mb4_general_ci
          binlog_ignore_db = mysql,information_schema,performance_schema,sys
      delegate_to: 192.168.1.51
      ignore_errors: true

    - name: Restart MySQL
      systemd:
        name: mysqld
        state: restarted

    - name: Lock master database
      shell: mysql -u root -p'{{ mysql_root_password }}' -e "FLUSH TABLES WITH READ LOCK;"
      register: master_log_status
      delegate_to: 192.168.1.51


    - name: Debug inventory_hostname and groups['slaves'][0]
      debug:
        msg: "inventory_hostname: {{ inventory_hostname }}, groups['slaves'][1]: {{ groups['slaves'][1] }}"

    - name: Stop MySQL service on slaves
      service:
        name: mysqld
        state: stopped
      when: inventory_hostname in groups['slaves']


    - name: Configure slave nodes
      blockinfile:
        path: /etc/my.cnf
        block: |
          server-id = {{ 2 if inventory_hostname == groups['slaves'][0] else 3 }}
          relay-log = mysql-relay-bin
          log-bin = mysql-bin
          binlog-do-db = work
          character-set-server = utf8mb4
          collation-server = utf8mb4_general_ci
          binlog_ignore_db = mysql,information_schema,performance_schema,sys
      when: inventory_hostname in groups['slaves']
      ignore_errors: true

    #- name: Copy relay - log and log - bin files from master
    #  copy:
    #    src: "/var/lib/mysql/{{ item }}"
    #    dest: "/var/lib/mysql/"
    #    remote_src: true
    #    mode: '0644'
    #  loop:
    #    - mysql-relay-bin
    #    - mysql-bin
    #  delegate_to: 192.168.1.51

    - name: Another task for all hosts
      debug:
        msg: "This task runs on all hosts in mysql_cluster"

    - name: Debug inventory_hostname
      debug:
        var: inventory_hostname

    - name: Get master status
      mysql_query:
        query: SHOW MASTER STATUS;
        login_user: root
        login_password: "{{ mysql_root_password }}"
      register: master_status_result
      delegate_to: 192.168.1.51
      run_once: true

    - name: Debug master status result
      debug:
        var: master_status_result
      delegate_to: 192.168.1.51

    - name: Start and enable MySQL service
      systemd:
        name: mysqld
        state: started
        enabled: true
      when: inventory_hostname in groups['slaves']

    - name: Configure slaves to connect to master
      mysql_replication:
        mode: changemaster
        master_host: 192.168.1.51
        master_user: "{{ replication_user }}"
        master_password: "{{ replication_password }}"
        master_log_file: "{{ master_status_result.query_result[0][0].File }}"
        master_log_pos: "{{ master_status_result.query_result[0][0].Position }}"
        login_user: root
        login_password: "{{ mysql_root_password }}"
      when: inventory_hostname in groups['slaves']
      register: slave_config_result

    - name: Debug slave configuration result
      debug:
        var: slave_config_result
      when: inventory_hostname in groups['slaves']

    - name: Unlock master database
      shell: mysql -u root -p'{{ mysql_root_password }}' -e "UNLOCK TABLES;"
      delegate_to: 192.168.1.51

    - name: Start slave replication
      mysql_replication:
        mode: startslave
        login_user: root
        login_password: "{{ mysql_root_password }}"
      when: inventory_hostname in groups['slaves']

  handlers:
    - name: Restart MySQL
      systemd:
        name: mysqld
        state: restarted
说明
变量定义:定义了 MySQL 的 root 密码、复制用户和密码以及主节点的 IP 地址。
配置阿里云源:将阿里云的 Centos-8.repo 文件复制到 /etc/yum.repos.d 目录下,并更新 Yum 缓存。
关闭防火墙和 SELinux:使用 systemd和 selinux 模块关闭防火墙和 SELinux。
安装 MySQL:安装 MySQL 8.4 的源和服务器,并启动 MySQL 服务。
设置 root 密码:获取初始临时密码,并设置新的 root 密码。
创建复制用户和 work 库:在主节点上创建用于复制的用户和 work 库。
配置主从节点:修改主从节点的 MySQL 配置文件,并重启 MySQL 服务。
配置复制:在从节点上配置复制,并启动复制进程。
使用方法
ansible.cfg
[defaults]
inventory = hosts
remote_user = root
ask_pass = false
private_key_file =/root/.ssh/id_rsa
创建一个 hosts 文件,定义主节点和从节点的 IP 地址:
[masters]
192.168.1.51

[slaves]
192.168.1.52
192.168.1.53

[mysql_cluster:children]
masters
slaves
将上述 mysql_cluster_deployment.yml 文件保存到 Ansible 控制节点上。
运行 Playbook:
ansible-playbook mysql_cluster_deployment.yml此 Ansible playbook 的作用是在由一主双从构成的 MySQL 8.0 集群上进行安装与配置。接下来,我会对这个 playbook 里的每个部分进行详细解释,并给出示例说明。
整体概述
该 playbook 包含了一系列任务,主要完成以下操作:
对系统环境进行配置,如禁用防火墙、SELinux 等。
安装 MySQL 8.0 服务器并设置 root 密码。
构建复制用户与工作数据库。
对主节点和从节点分别进行配置。
启动从节点的复制功能。
1. Playbook 头部信息
---
- name: Install and configure MySQL 8.0 cluster
  hosts: mysql_cluster
  gather_facts: no
  vars:
    mysql_root_password: "MySql@12345677#!"
    replication_user: repl
replication_password: "MySql@123456789#!"name:对 playbook 的功能进行描述。hosts:指定该 playbook 要运行在哪些主机上,这里是mysql_cluster。gather_facts:是否收集主机的事实信息,这里设为no表示不收集。vars:定义了一些变量,像 MySQL 的 root 密码、复制用户及其密码。
2. 调试任务
- name: Debug inventory_hostname
  debug:
    var: inventory_hostname
此任务的作用是打印当前主机的名称,方便调试。
3. 系统环境配置
- name: Disable firewalld
  systemd:
    name: firewalld
    state: stopped
    enabled: false

- name: Disable SELinux
  selinux:
    state: disabled
Disable firewalld:停止并禁用防火墙服务。Disable SELinux:禁用 SELinux。
4. 安装依赖软件
- name: Install Python3 and pip
  dnf:
    name:
      - python3
      - python3-pip
    state: present

- name: Install Rust development environment
  block:
    ...

- name: Install setuptools_rust
  pip:
    name: setuptools_rust
    state: present
    extra_args: '-i https://mirrors.aliyun.com/pypi/simple/'

- name: Install cryptography package
  pip:
    name: cryptography
    state: present
    extra_args: '-i https://mirrors.aliyun.com/pypi/simple/'
Install Python3 and pip:借助dnf包管理器安装 Python3 和 pip。Install Rust development environment:安装 Rust 开发环境。Install setuptools_rust和Install cryptography package:使用 pip 安装setuptools_rust和cryptography包。
5. 安装 MySQL 8.0
- name: Import MySQL GPG key
  rpm_key:
    state: present
    key: https://repo.mysql.com/RPM-GPG-KEY-mysql-2022

- name: Install MySQL 8.0 repository
  dnf:
    name: https://repo.mysql.com//mysql80-community-release-el8-1.noarch.rpm
    state: present
    disable_gpg_check: yes

- name: Clean DNF cache
  shell: dnf clean all
  args:
    warn: false

- name: Disable MySQL module using shell
  shell: dnf module disable mysql -y
  args:
    warn: false

- name: Install MySQL server
  dnf:
    name: mysql-community-server
    state: present
    disable_gpg_check: yes

- name: Start and enable MySQL service
  systemd:
    name: mysqld
    state: started
    enabled: true
Import MySQL GPG key:导入 MySQL 的 GPG 密钥。Install MySQL 8.0 repository:安装 MySQL 8.0 的软件仓库。Clean DNF cache:清理 DNF 缓存。Disable MySQL module using shell:禁用系统自带的 MySQL 模块。Install MySQL server:安装 MySQL 服务器。Start and enable MySQL service:启动并设置 MySQL 服务开机自启。
6. 设置 MySQL root 密码
- name: Set authentication plugin to mysql_native_password
  lineinfile:
    path: /etc/my.cnf
    line: "default_authentication_plugin = mysql_native_password"
    create: true
  notify:
    - Restart MySQL

- name: Get initial root password
  shell: grep 'temporary password' /var/log/mysqld.log | awk '{print $NF}'
  register: initial_root_password
  changed_when: false

- name: Set root password using socket
  shell: |
    mysql -u root -p"{{ initial_root_password.stdout }}"  --connect-expired-password -e  "ALTER USER 'root'@'localhost' IDENTIFIED BY '{{ mysql_root_password }}';"
  ignore_errors: true

- name: Flush privileges
  mysql_query:
    query: FLUSH PRIVILEGES
    login_user: root
    login_password: "{{ mysql_root_password }}"
  ignore_errors: true

- name: Check root password validity
  mysql_query:
    query: SELECT 1
    login_user: root
    login_password: "{{ mysql_root_password }}"
  register: root_password_check
  ignore_errors: true

- name: Reset root password if invalid
  mysql_user:
    name: root
    password: "{{ mysql_root_password }}"
    host: localhost
    priv: '*.*:ALL,GRANT'
    login_unix_socket: /var/lib/mysql/mysql.sock
  when: root_password_check.failed
Set authentication plugin to mysql_native_password:把 MySQL 的认证插件设置为mysql_native_password,并重启 MySQL 服务。Get initial root password:从 MySQL 日志文件里获取初始的临时 root 密码。Set root password using socket:利用临时密码把 root 密码设置为自定义密码。Flush privileges:刷新权限。Check root password validity:检查 root 密码是否有效。Reset root password if invalid:若密码无效,则重新设置 root 密码。
7. 创建复制用户和工作数据库
- name: Create replication user
  shell: |
    mysql -u root -p"{{ mysql_root_password }}" -e "
    CREATE USER '{{ replication_user }}'@'%' IDENTIFIED WITH mysql_native_password  BY '{{ replication_password }}';
    GRANT REPLICATION SLAVE ON *.* TO '{{ replication_user }}'@'%';
    FLUSH PRIVILEGES;"
  delegate_to: 192.168.1.51
  ignore_errors: true

- name: Create work database
  mysql_db:
    name: work
    encoding: utf8mb4
    collation: utf8mb4_general_ci
    state: present
    login_user: root
    login_password: "{{ mysql_root_password }}"
  delegate_to: 192.168.1.51
  ignore_errors: true
Create replication user:在主节点(192.168.1.51)上创建复制用户。Create work database:在主节点上创建工作数据库work。
8. 配置主节点
- name: Configure master node
  blockinfile:
    path: /etc/my.cnf
    block: |
      server-id = 1
      relay-log = mysql-relay-bin
      log-bin = mysql-bin
      binlog-do-db = work
      character-set-server = utf8mb4
      collation-server = utf8mb4_general_ci
      binlog_ignore_db = mysql,information_schema,performance_schema,sys
  delegate_to: 192.168.1.51
  ignore_errors: true

- name: Restart MySQL
  systemd:
    name: mysqld
    state: restarted

- name: Lock master database
  shell: mysql -u root -p'{{ mysql_root_password }}' -e "FLUSH TABLES WITH READ LOCK;"
  register: master_log_status
  delegate_to: 192.168.1.51
Configure master node:在主节点上配置 MySQL 的my.cnf文件。Restart MySQL:重启 MySQL 服务。Lock master database:对主数据库进行加锁,以获取主节点的二进制日志状态。
9. 配置从节点
- name: Stop MySQL service on slaves
  service:
    name: mysqld
    state: stopped
  when: inventory_hostname in groups['slaves']

- name: Configure slave nodes
  blockinfile:
    path: /etc/my.cnf
    block: |
      server-id = {{ 2 if inventory_hostname == groups['slaves'][0] else 3 }}
      relay-log = mysql-relay-bin
      log-bin = mysql-bin
      binlog-do-db = work
      character-set-server = utf8mb4
      collation-server = utf8mb4_general_ci
      binlog_ignore_db = mysql,information_schema,performance_schema,sys
  when: inventory_hostname in groups['slaves']
  ignore_errors: true

- name: Start and enable MySQL service
  systemd:
    name: mysqld
    state: started
    enabled: true
  when: inventory_hostname in groups['slaves']

- name: Configure slaves to connect to master
  mysql_replication:
    mode: changemaster
    master_host: 192.168.1.51
    master_user: "{{ replication_user }}"
    master_password: "{{ replication_password }}"
    master_log_file: "{{ master_status_result.query_result[0][0].File }}"
    master_log_pos: "{{ master_status_result.query_result[0][0].Position }}"
    login_user: root
    login_password: "{{ mysql_root_password }}"
  when: inventory_hostname in groups['slaves']
  register: slave_config_result

- name: Start slave replication
  mysql_replication:
    mode: startslave
    login_user: root
    login_password: "{{ mysql_root_password }}"
  when: inventory_hostname in groups['slaves']
Stop MySQL service on slaves:停止从节点上的 MySQL 服务。Configure slave nodes:对从节点的my.cnf文件进行配置。Start and enable MySQL service:启动并设置从节点的 MySQL 服务开机自启。Configure slaves to connect to master:将从节点配置为连接到主节点。Start slave replication:启动从节点的复制功能。
10. 解锁主数据库
- name: Unlock master database
  shell: mysql -u root -p'{{ mysql_root_password }}' -e "UNLOCK TABLES;"
  delegate_to: 192.168.1.51
此任务用于解锁主数据库。
11. 处理程序
handlers:
  - name: Restart MySQL
    systemd:
      name: mysqld
      state: restarted
当有任务触发 Restart MySQL 处理程序时,会重启 MySQL 服务。
示例说明
假设你有一个包含三个主机的 mysql_cluster,其中 192.168.1.51 为主节点,192.168.1.52 和 192.168.1.53 为从节点。在 hosts 文件里,你可以这样配置:
[mysql_cluster]
192.168.1.51
192.168.1.52
192.168.1.53

[slaves]
192.168.1.52
192.168.1.53
然后运行这个 playbook:
ansible-playbook -i hosts mysql_cluster.yml这样,Ansible 就会依据 playbook 里的任务顺序,在各个主机上完成 MySQL 一主双从集群的安装与配置。
备注:
ansible-galaxy collection install ansible.posix